Seven Sisters Photography Guide: Camera Settings, Best Viewpoints & Golden Hour
Seven Sisters Photography Guide
Camera settings, 8 best viewpoints with GPS, golden hour timing—everything we've learned from shooting these cliffs first-hand
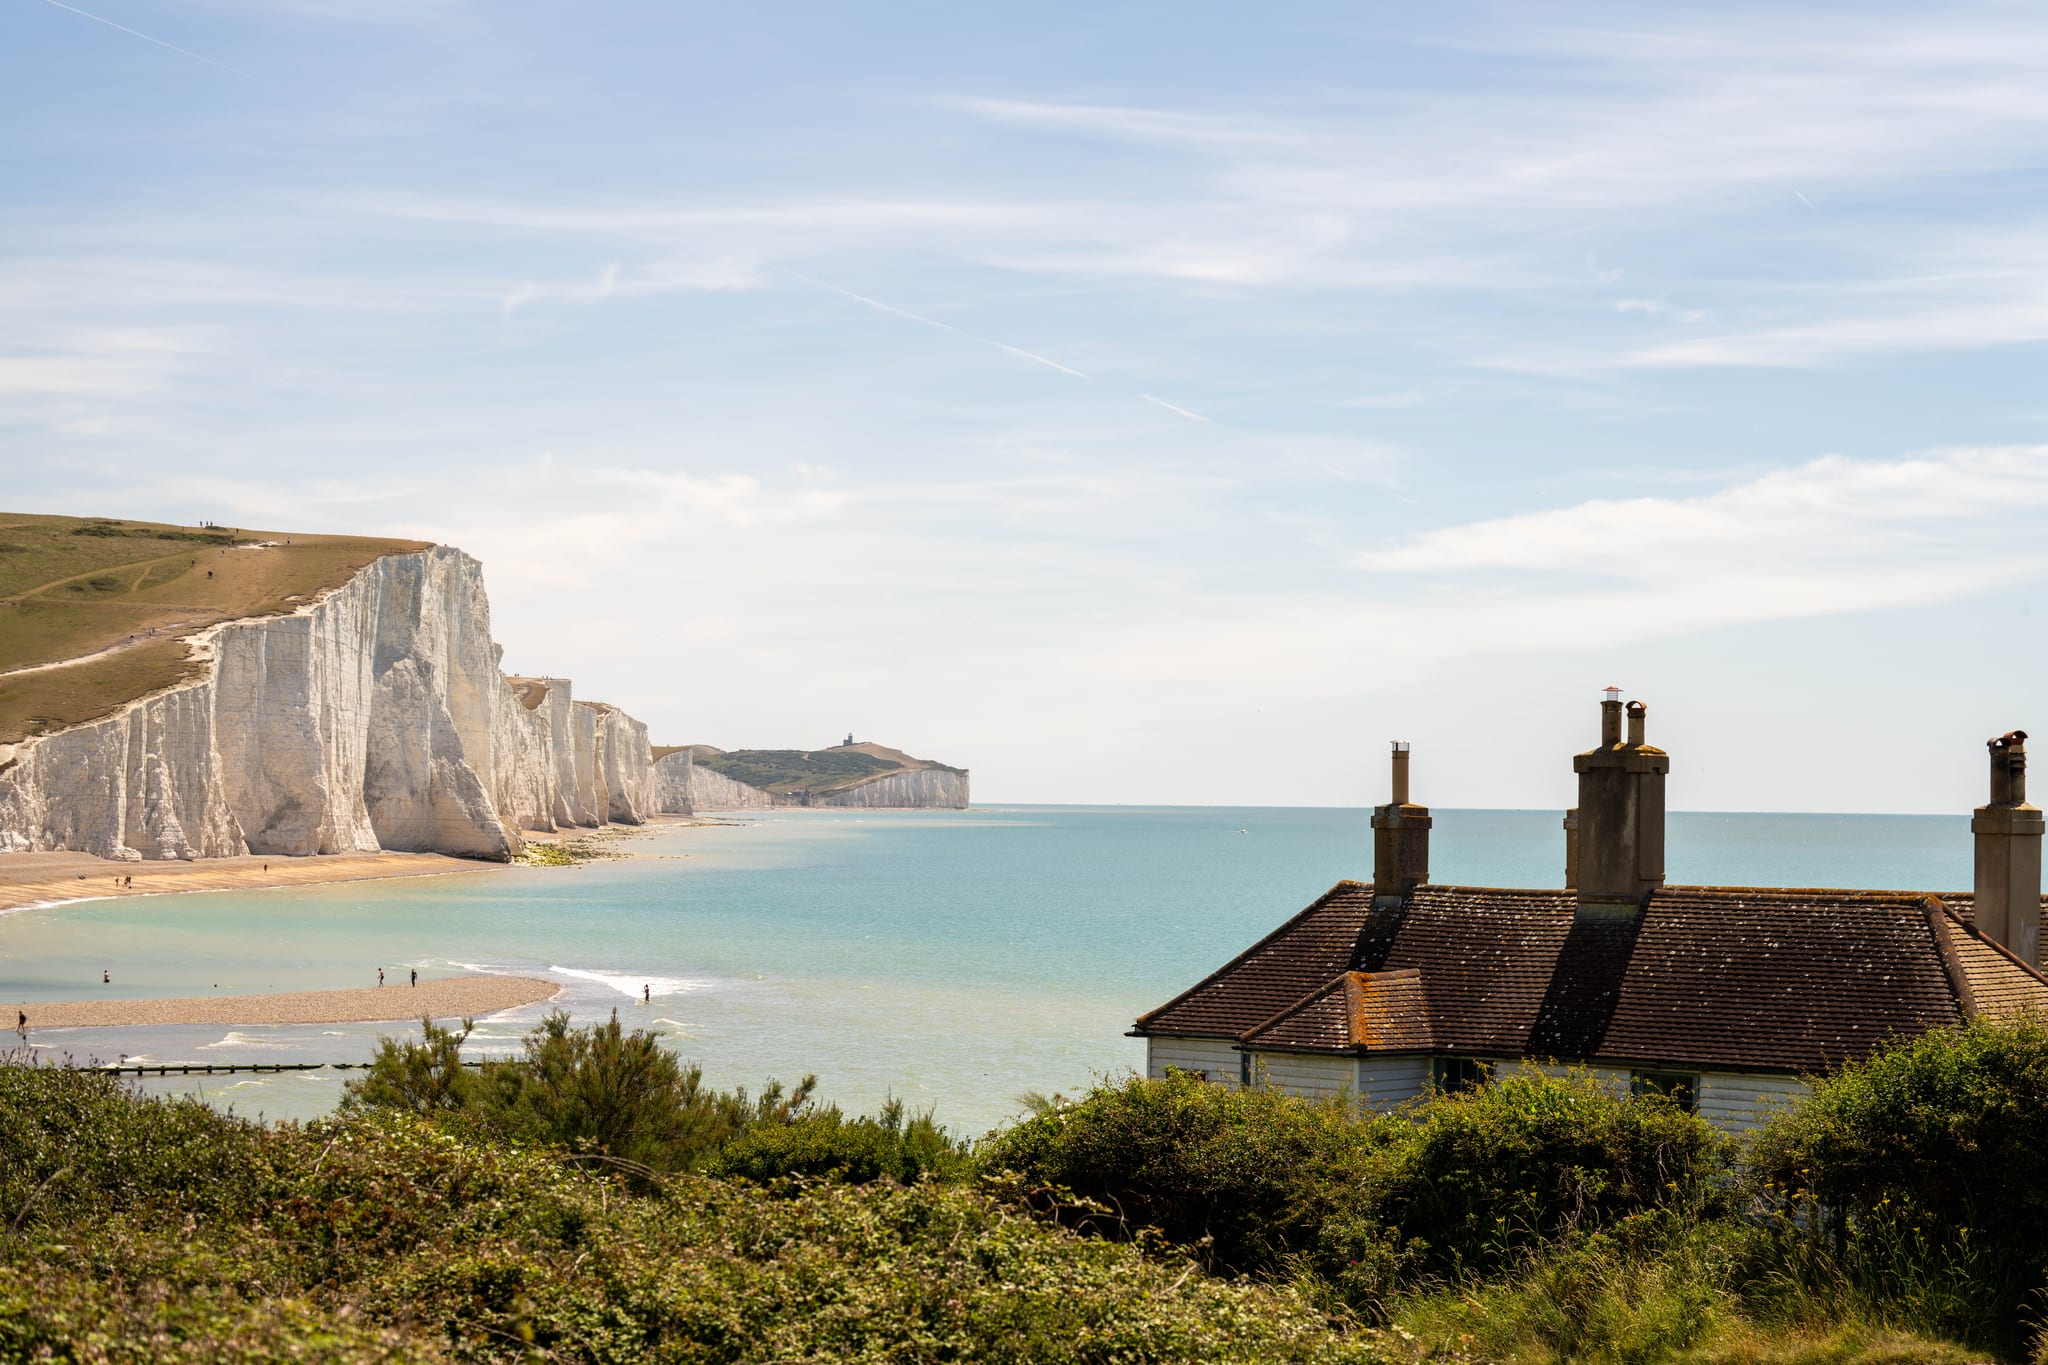
The Seven Sisters are a photographer's dream—white chalk cliffs against green grass, dramatic coastal curves, perfect golden hour light. But here's what Instagram doesn't show you: most visitors turn up at noon with their phone, stand at Cuckmere Haven, take the same shot everyone else takes, and leave. Which is fine, but you're capable of much better.
We photograph these cliffs across every season—sunrise missions in February, sunset shoots in July, everything in between. We've learned which viewpoints actually work, what camera settings handle the chalk without blowing highlights, when the light transforms mediocre into spectacular. This is everything we know, broken down shot by shot.
Equipment reality check: You don't need a £3,000 DSLR. Some of our best shots are on a phone. But you do need to understand light, composition, and timing. The gear matters less than knowing where to stand and when to be there.
Camera Settings That Actually Work
Chalk cliffs are deceptively tricky to photograph. The white chalk wants to blow out, the grass foreground sits in shadow, the sky either washes out or goes nuclear blue. Here's what we've learned works consistently across different conditions.
DSLR / Mirrorless Settings
📷 ISO
Bright days: ISO 100-200 (maximum quality, no noise)
Overcast: ISO 400-800 (compromise between shutter speed and quality)
Sunrise/Sunset: ISO 800-1600 (accept some noise for handheld sharpness)
🎯 Aperture
Landscapes: f/8-f/11 (sweet spot for sharpness across frame)
Maximum depth: f/16 (foreground wildflowers to distant cliffs)
Avoid: f/22+ (diffraction softens everything)
⚡ Shutter Speed
Handheld minimum: 1/125s (prevents camera shake)
Tripod: 1/30s-1s (smooth water, dramatic clouds)
Long exposure: 30s+ with ND filter (silk water, motion blur grass)
Smartphone Photography
📱 Native Camera App
Tap to expose for the cliffs, not the sky. Let the sky blow out slightly—you can recover it in editing. Exposing for sky makes cliffs grey and muddy.
Use HDR mode for high-contrast scenes (bright cliffs + dark foreground).
📲 Recommended Apps
Lightroom Mobile: RAW capture, exposure control, best editing
ProCam: Manual controls (ISO, shutter, focus)
Slow Shutter Cam: Long exposures without tripod (sort of)
💡 Pro Tips
Clean your lens (grass, salt spray, fingerprints ruin shots)
Use volume button as shutter (steadier than screen tap)
Shoot in RAW if possible (way more editing flexibility)
⚠️ White Balance for Chalk Cliffs
This is the tricky bit. Auto white balance tends to make chalk look blue-grey (camera thinks it's too bright and compensates). Here's what works:
Sunny days: Daylight preset (5500K) or slightly warmer (6000K)
Overcast: Cloudy preset (6500K) adds warmth to grey light
Our approach: Shoot RAW, adjust in post—much easier than getting it perfect in-camera
8 Best Viewpoints (With GPS Coordinates)
These are the spots we return to again and again. GPS coordinates are precise—use them in Google Maps or OS Locate app to find exact positions. Each viewpoint offers different compositions, different light, different challenges.
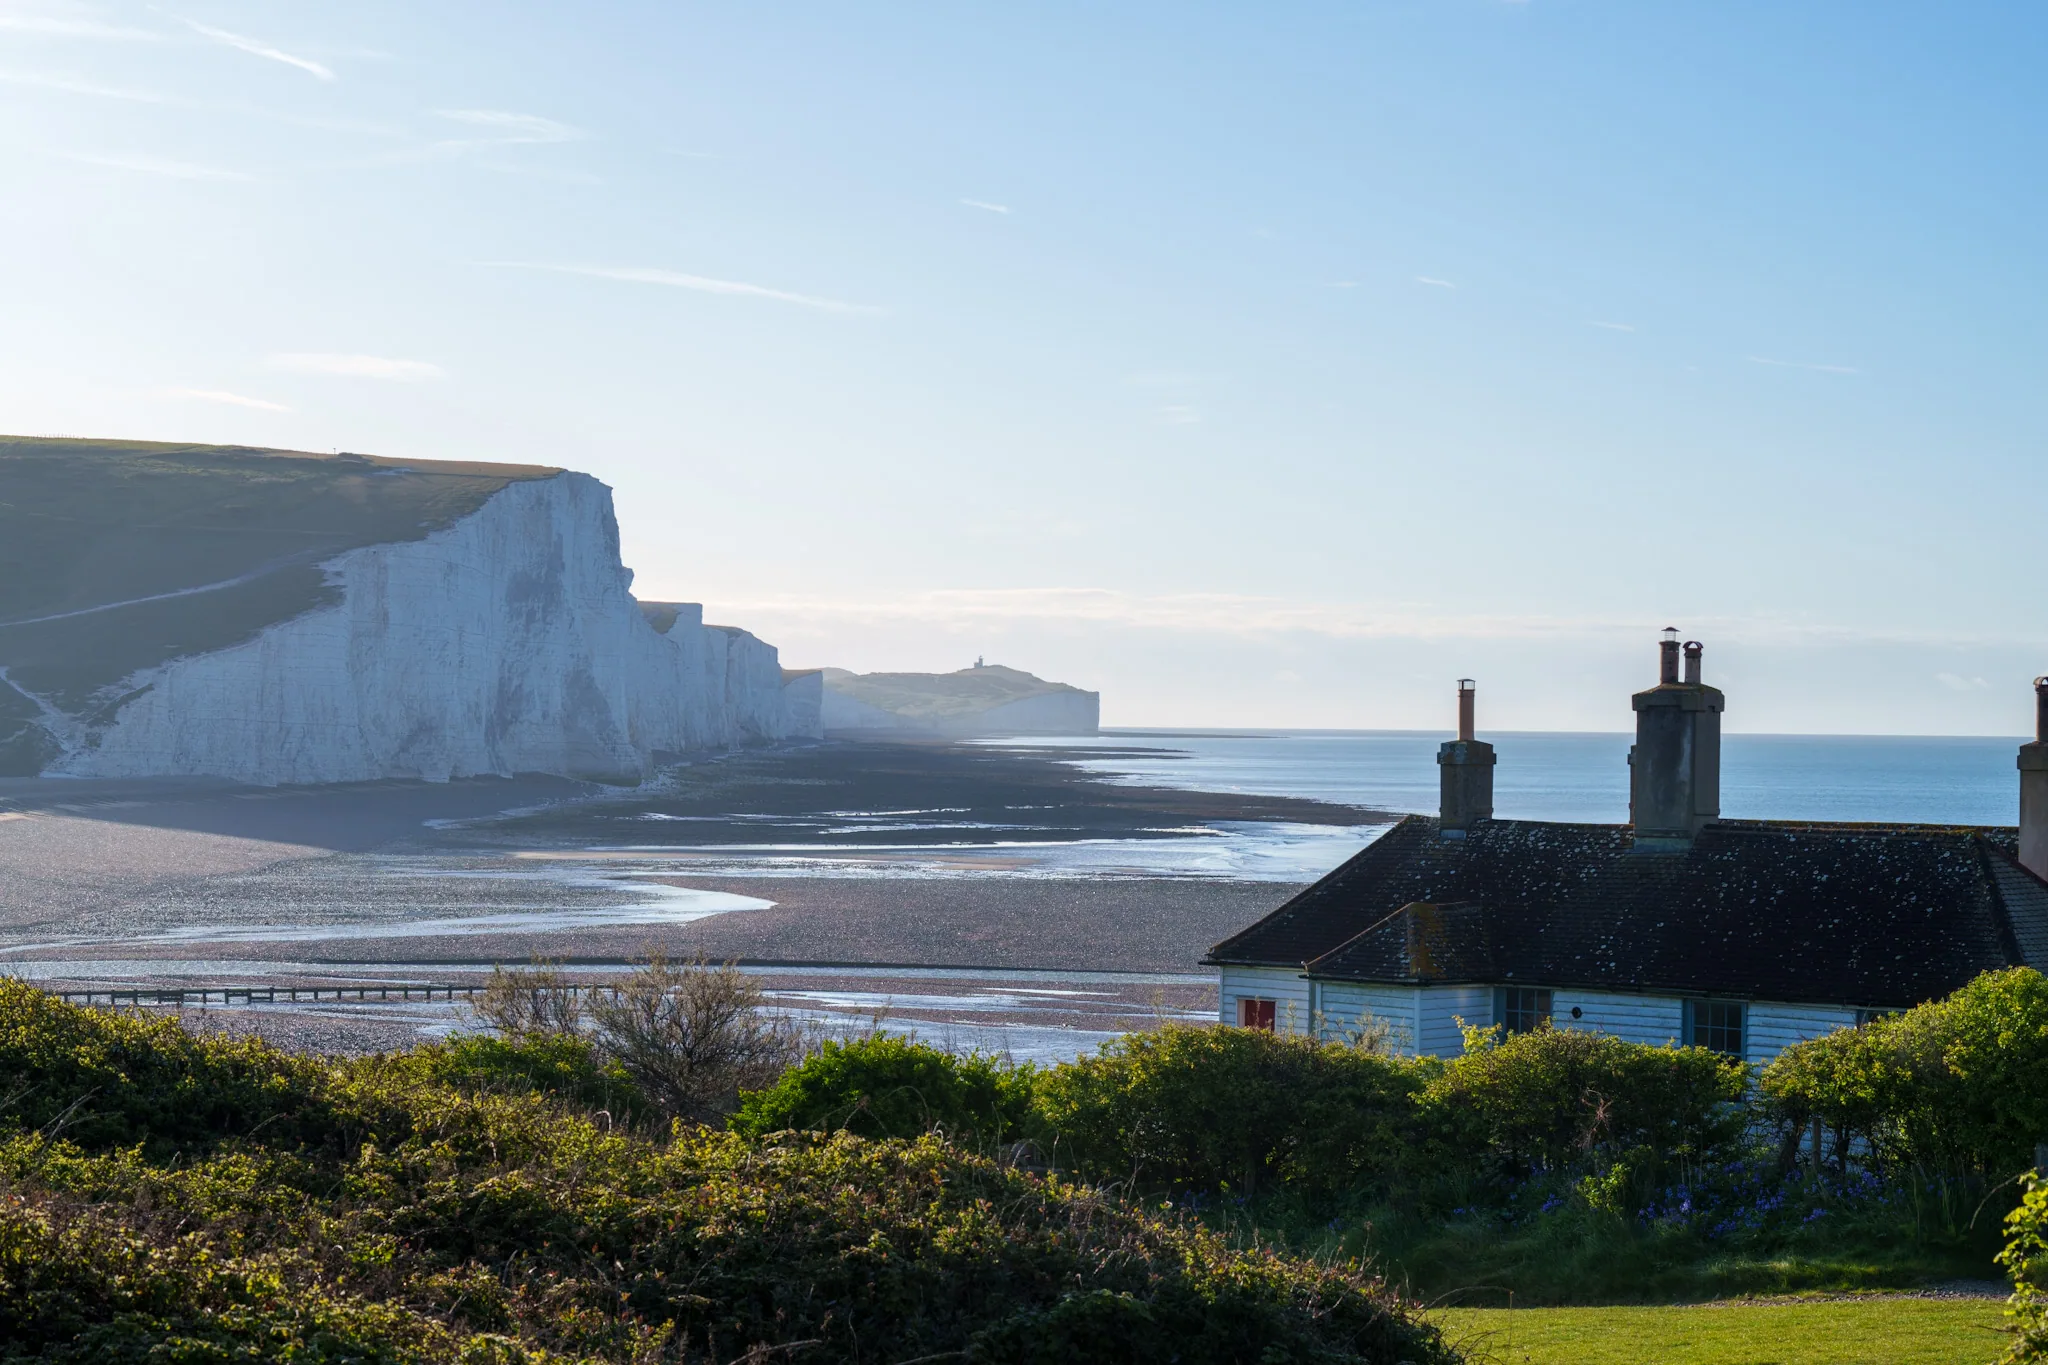
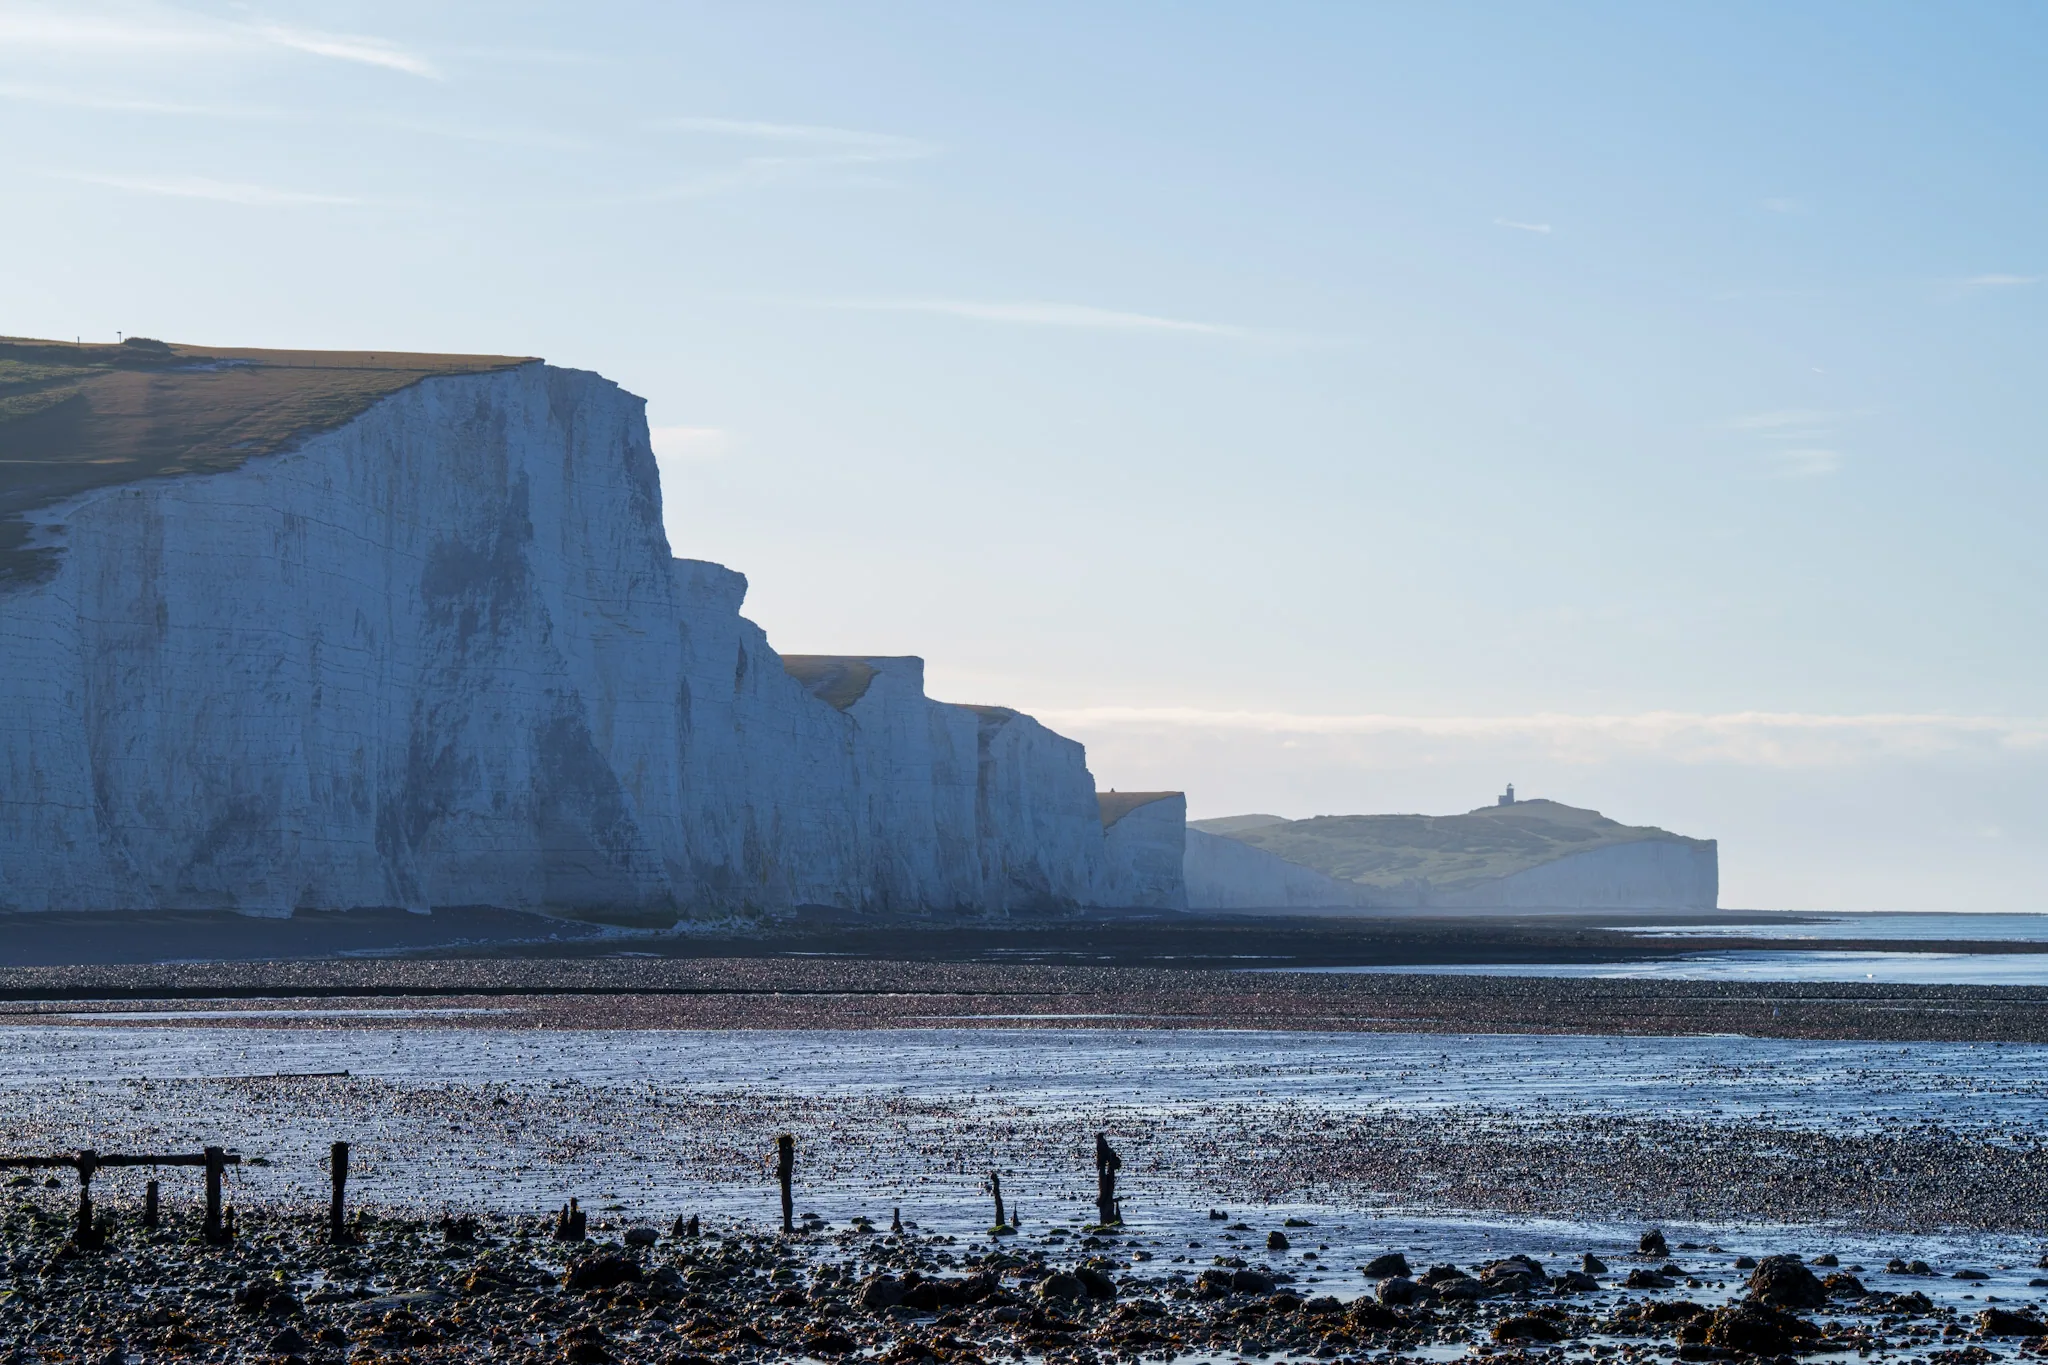
1. Cuckmere Haven Meanders
GPS: 50.7803, 0.1439
Best Time
7:00-8:30am, 7:00-8:30pm (summer)
What You'll Shoot
Oxbow meanders + Sisters backdrop
Difficulty
Easy (20-min flat walk)
This is THE Seven Sisters shot—the one you've seen everywhere. The oxbow meanders of the old Cuckmere River curving through the foreground, all seven sisters marching off into the distance. It's iconic for a reason: the composition is spectacular.
Composition tips: Stand on the eastern bank looking southwest. Include the river curves in the lower third (essential foreground interest). The meanders lead the eye toward the cliffs. Wide angle works best (16-24mm) to get everything in frame.
The challenge: This spot is popular. Sunrise means you'll have 5-10 other photographers setting up tripods. Sunset is slightly less crowded but still busy. We've had tripod battles here—not proud of it, but it happens when space is limited.
Our verdict: Worth doing once for the classic shot. But honestly, viewpoints 2 and 4 offer more interesting compositions with fewer people. Access via Exceat car park, 20-minute walk.
2. Seaford Head Looking East
GPS: 50.7567, 0.1333
Best Time
Sunrise, 7:00-9:00am
What You'll Shoot
All seven sisters in profile
Difficulty
Moderate (45-min climb)
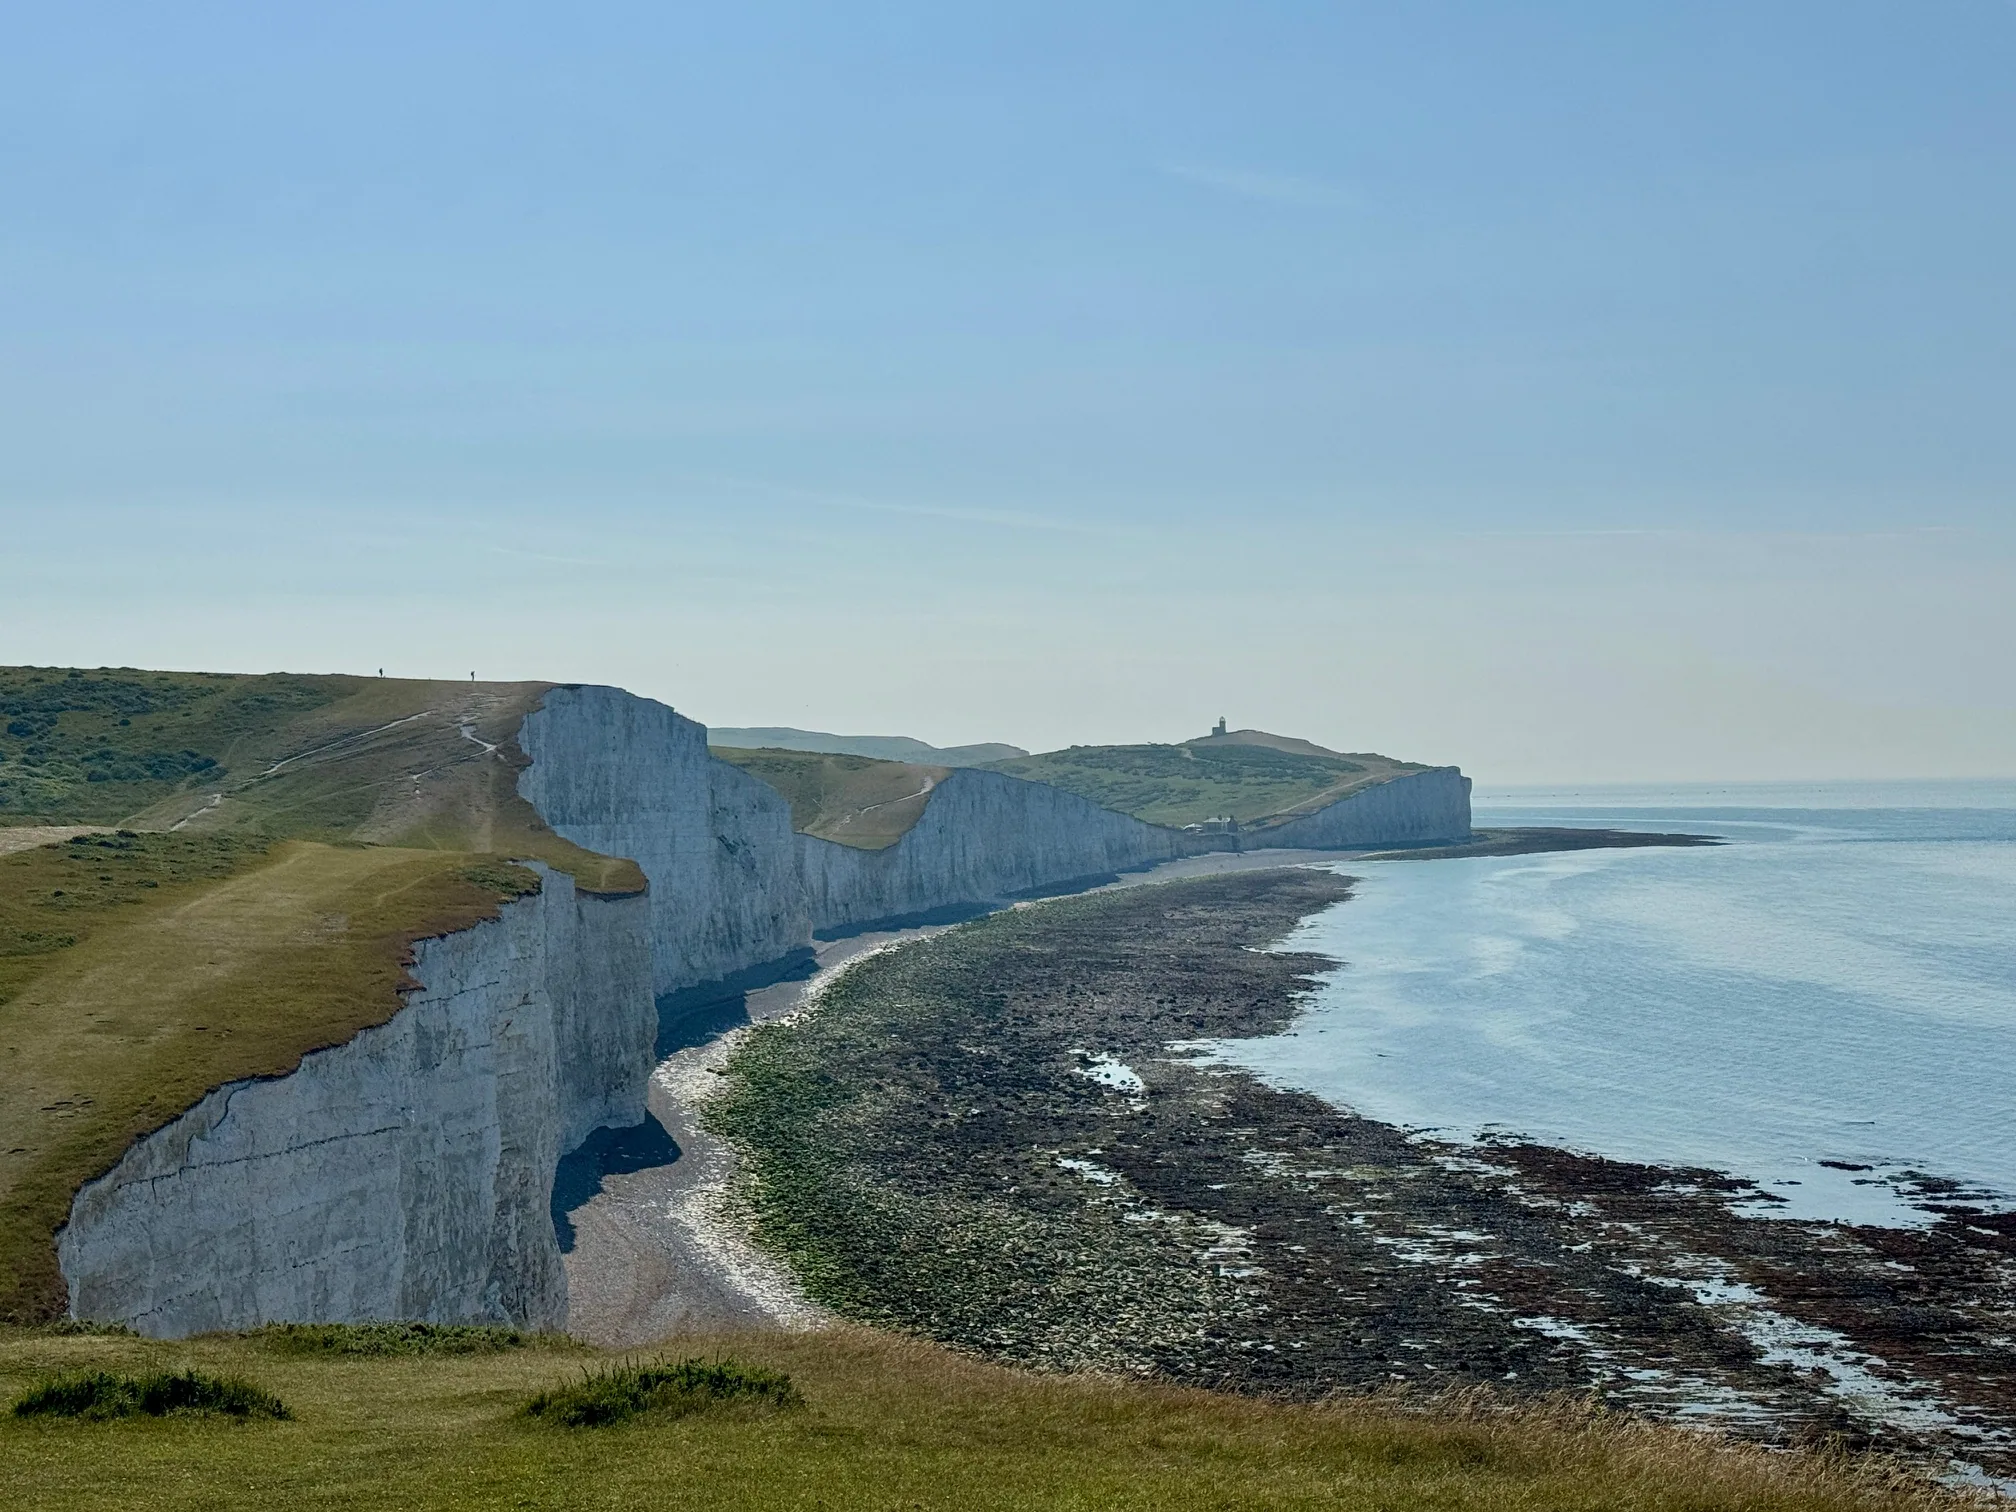
This is our personal favorite viewpoint. From Seaford Head summit, you get all seven sisters laid out in perfect profile—every peak, every valley, the full undulating ridgeline stretching east toward Eastbourne. The perspective is unique because you're seeing them from the same height, not from below.
Composition tips: Use the fence line running along the cliff edge as a leading line (rule of thirds). Shoot with telephoto (70-200mm) to compress the perspective and emphasize the seven distinct peaks. Wide angle makes them look too spread out.
From our own dawn shoots: We've done sunrise here many times. At 6am it's completely empty—just you, the cliffs, and occasionally a confused sheep. By 9am dog walkers arrive. The climb from Seaford is steep but manageable in 45 minutes.
Pro tip: Arrive 30 minutes before sunrise. Set up while it's still dark (bring torch). The pre-dawn blue hour creates incredible atmospheric shots, then the sunrise light hits the cliffs from the side—pure gold.
3. Birling Gap Beach Looking West
GPS: 50.7417, 0.2005
Best Time
Afternoon, 6:00-8:30pm (summer)
What You'll Shoot
Sisters with beach foreground
Difficulty
Easy (83 steps down)
Completely different perspective: you're at beach level looking up at the cliffs towering above. The beach provides incredible foreground options—rock pools, wave patterns, wet chalk reflections at low tide. Sunset light hits the cliffs side-on, creating texture and drama.
Composition tips: Low angle (get down near beach level) makes cliffs look even more imposing. Use rock pools or seaweed patterns as foreground interest. Long exposure (2-10 seconds) smooths the waves into mist around the chalk boulders.
Challenges: Those 83 steps are brutal with heavy camera gear. We learned this the hard way—tripod, DSLR, telephoto lens, wide angle, filters, all carried down and back up. Now we go minimal: one lens, small tripod, that's it.
Tide consideration: Best at mid to low tide when beach is wide. High tide limits shooting area. Check tide times before descending. Access from Birling Gap car park.
4. Haven Brow Summit
GPS: 50.7560, 0.1605
Best Time
Late afternoon, golden hour
What You'll Shoot
360° panoramic views
Difficulty
Moderate (steep ridge climb)
Haven Brow is the first (and highest at ~77m) of the Seven Sisters. From the summit, you can shoot in any direction: west toward Seaford, east along the remaining six sisters, north over Cuckmere Valley, south to open Channel. It's genuinely spectacular.
Composition tips: The cliff edge provides dramatic foreground (stay safe, 5m back minimum). Frame grass/wildflowers in bottom third, cliffs in middle, sky in top third. Dramatic clouds make or break this shot—flat grey sky wastes the potential.
Best seasons: April-May when grass is neon green, or October when autumn light turns everything golden. Summer grass goes yellow-brown by July, less photogenic contrast with white chalk.
Safety note: Wind is serious up here. We've had tripods nearly blow over. Weight your tripod (hang camera bag from center column). Cliff edge is unfenced—respect it. See our safety guide for details.
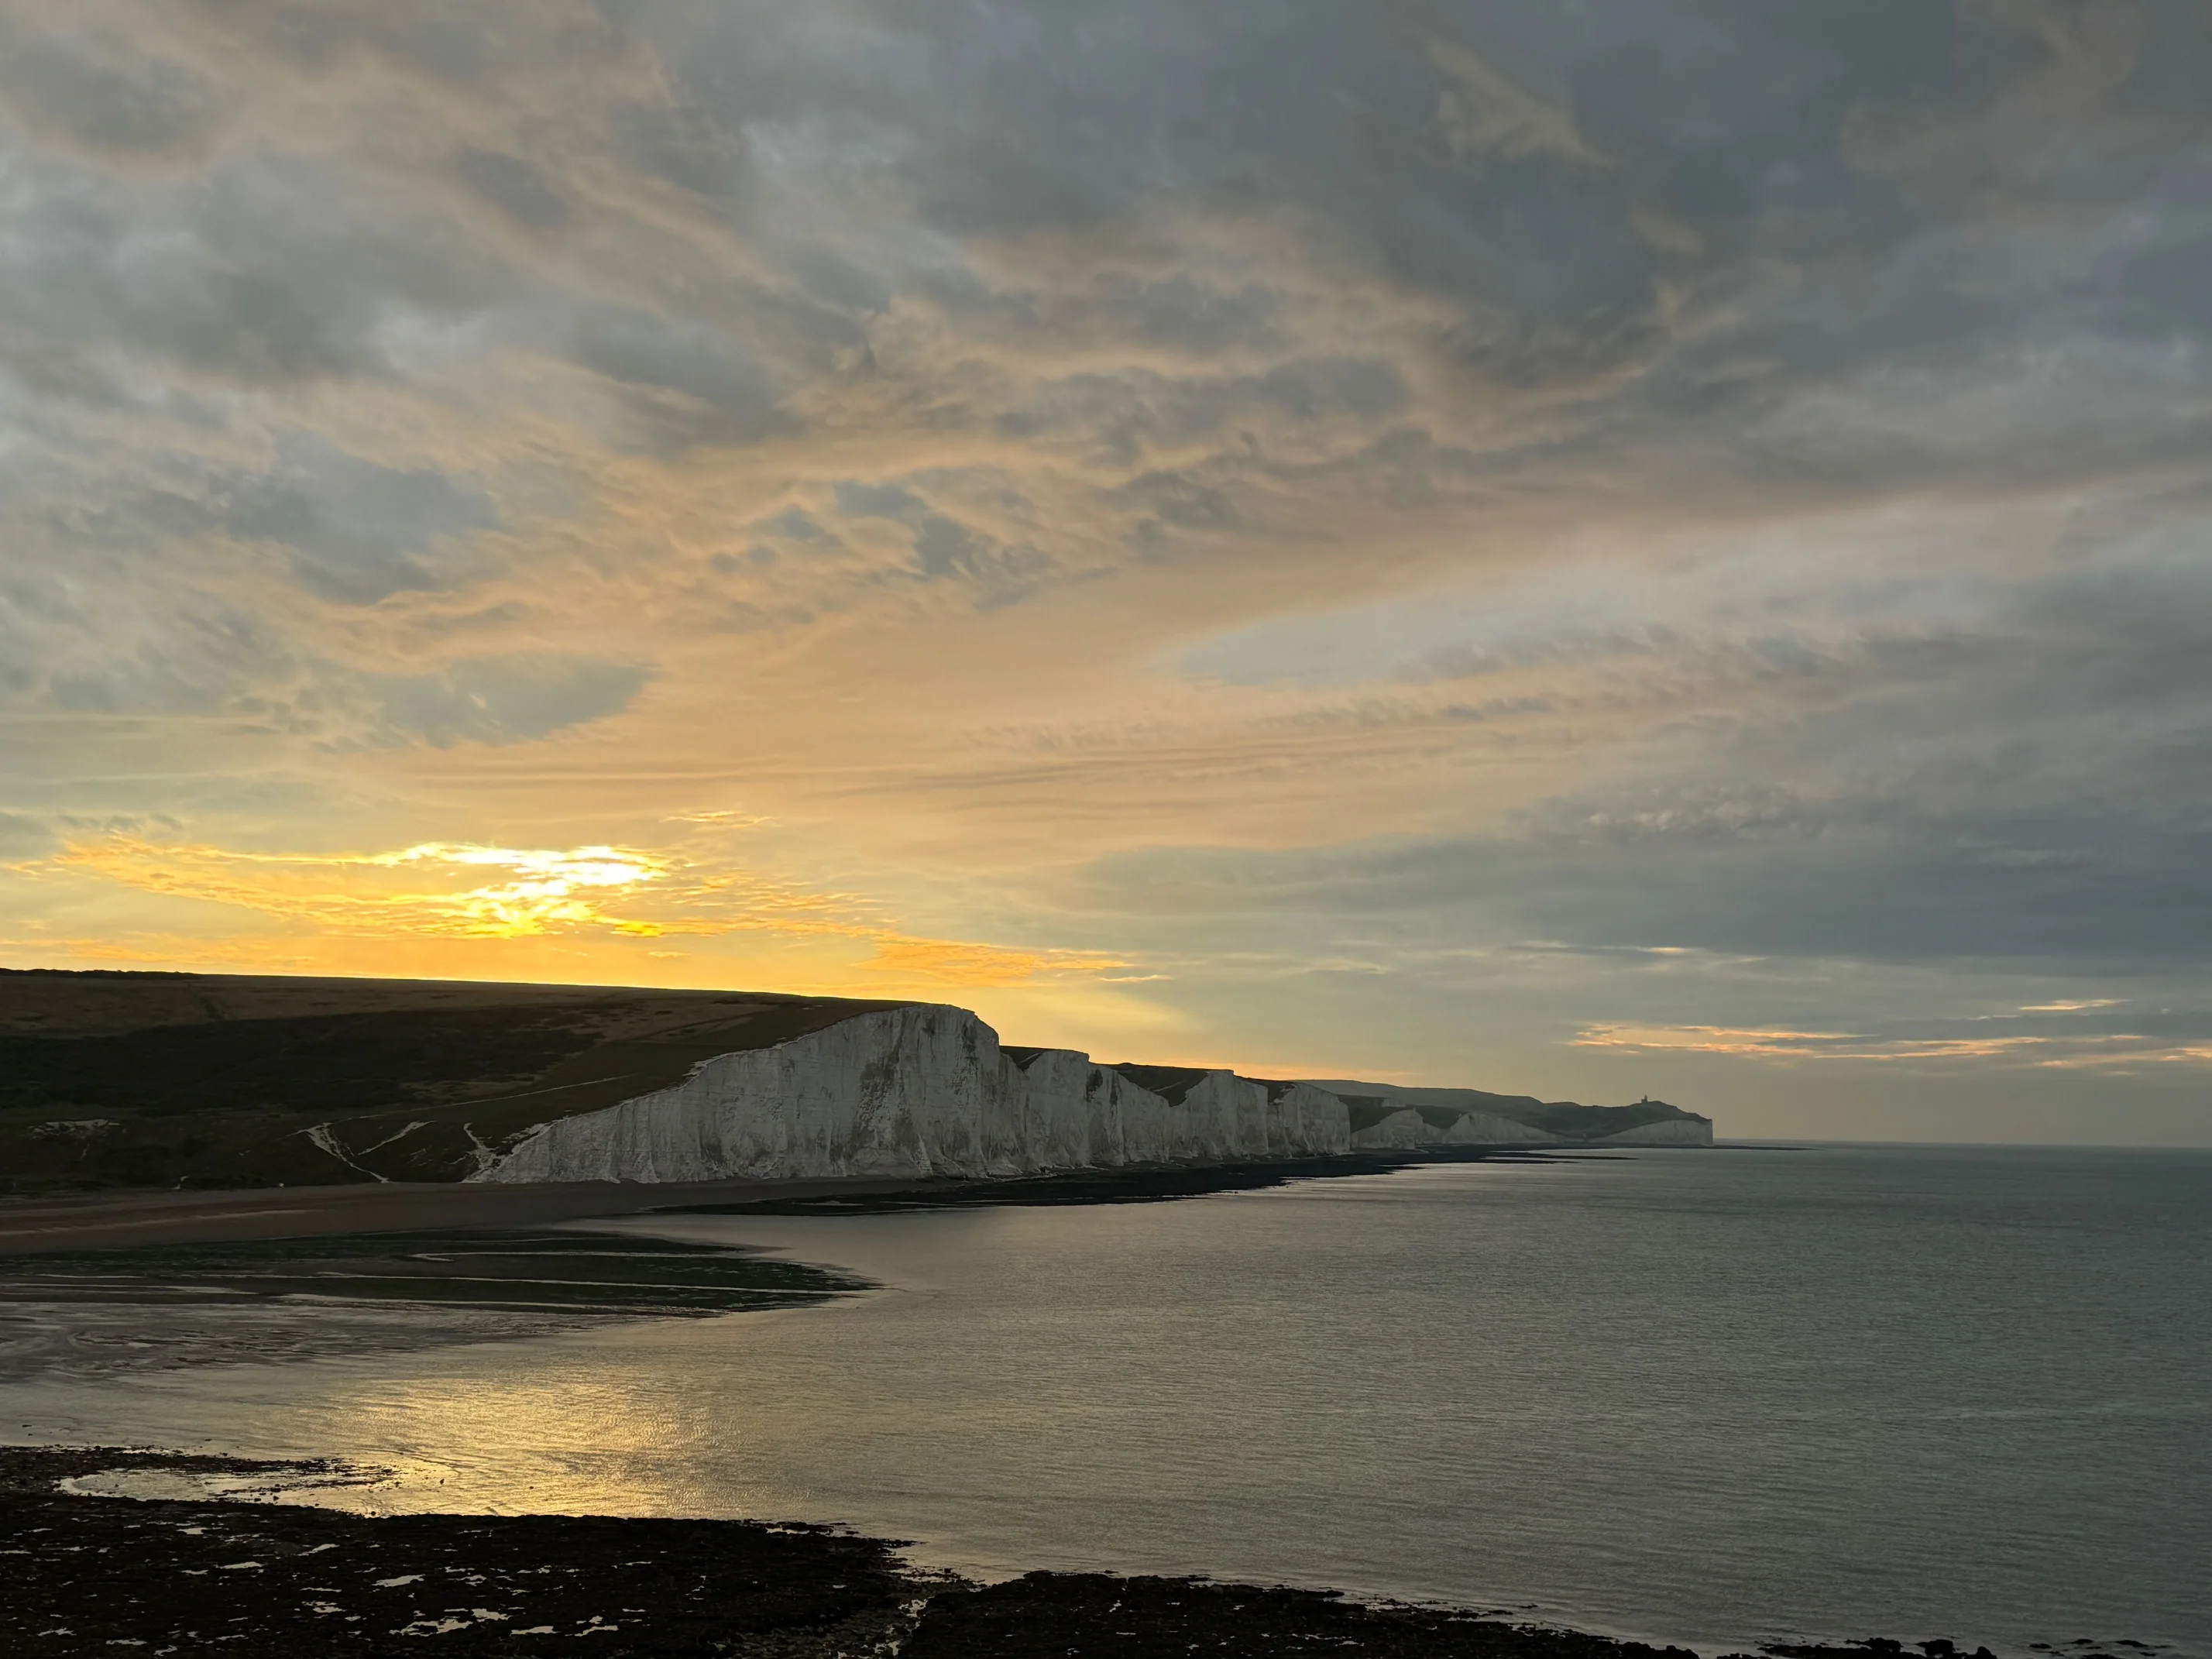
5. Belle Tout Lighthouse Area
GPS: 50.7382, 0.2103
The decommissioned Belle Tout lighthouse (now a B&B) sits on the clifftop near Beachy Head. Shoot from the public coastal path with the lighthouse in the left third, Seven Sisters extending to the right. Sunset and blue hour are magical here—the lighthouse lit up against darkening sky, cliffs glowing in last light.
Respect private property: The lighthouse is private. Shoot from the public path only (clearly marked). Don't enter the grounds even for "better angles"—we've seen photographers kicked off.
Our tip: Blue hour (20-40 minutes after sunset) is actually better than sunset itself. The lighthouse lights create a focal point, sky goes deep blue, cliffs catch the last glow. Worth staying for. See lighthouse history.
6. Hope Gap Beach
GPS: 50.7547, 0.1389
Hope Gap has a natural chalk arch and wave-cut platform that create unique foreground interest. Mid-morning light works best—sun illuminates the arch from the side, creating depth and texture. Long exposure (10-30 seconds with ND filter) turns the waves into ethereal mist around the white chalk.
Access: Steep path down from clifftop (10 minutes). Check tides—platform gets cut off at high tide. We once got trapped for 90 minutes waiting for water to recede. Not fun with camera gear.
Composition: Frame through the arch looking toward Seven Sisters, or position arch as left-third element with cliffs extending right. Requires creativity—this spot rewards experimentation. See Hope Gap guide.
7. East of Birling Gap Clifftop
GPS: 50.7395, 0.2087
Walk 10 minutes east from Birling Gap car park along the coastal path. You'll find yourself looking back west at all seven sisters—similar view to Seaford Head but from the opposite end. Morning light is best here (cliffs side-lit from the east).
Why we like it: Much quieter than Birling Gap itself. Grass foreground leads naturally toward the cliffs. You can position yourself at various distances for different telephoto compressions—70mm, 100mm, 200mm all work.
Crowd factor: Most tourists don't walk this far from the car park. Even summer weekends, you'll have the spot mostly to yourself. Great for patient composition work without tripod battles.
8. Foxhole Bottom Approach
GPS: 50.7548, 0.1892
Honestly? This isn't the most dramatic viewpoint. You're further from the cliffs, the composition is less striking. But that's exactly why we include it—it's a great practice spot. Easy access from roadside parking, no crowds, good light throughout the day.
Use it for: Testing new camera settings, practicing composition techniques, getting familiar with Seven Sisters photography before committing to sunrise missions or challenging locations. We use this as a warm-up spot.
Access: Free roadside parking at Foxhole Bottom layby (rarely full). 5-minute walk to viewpoint. Completely flat terrain. Good option if mobility is limited or you're scouting for future shoots.
Golden Hour & Blue Hour Timing
Golden hour—the hour after sunrise and hour before sunset—is when chalk cliffs transform from "nice" to "stunning." The low-angle light creates texture, warmth, and drama that midday sun can't touch. Here's when to actually be there.
Monthly Sunrise/Sunset Times
📅 April - May
Sunrise: 6:00-6:30am
Sunset: 8:00-8:30pm
Best: Greenest cliffs, wildflowers blooming, reasonable wake-up time
📅 June - July
Sunrise: 5:00-5:30am
Sunset: 9:00-9:15pm
Challenge: Brutal wake-up for sunrise, but sunset timing is perfect
📅 August - September
Sunrise: 6:00-6:15am
Sunset: 7:30-8:00pm
Sweet spot: Manageable sunrise timing, golden autumn light
📅 October
Sunrise: 7:00-7:30am
Sunset: 6:00-6:30pm
Photographer's favorite: Dramatic light, easier timing, fewer crowds
💡 Why Golden Hour Matters for Chalk Cliffs
At midday, the sun is directly overhead. The chalk looks flat white, shadows are harsh and short, there's no texture or depth. It's the photographic equivalent of fluorescent office lighting—technically visible but completely uninspiring.
Golden hour light comes in at a low angle. It rakes across the cliff face, emphasizing every contour, every fold in the chalk. The white takes on warm tones—cream, gold, even pink at peak golden hour. The grass glows. The whole scene becomes three-dimensional instead of flat.
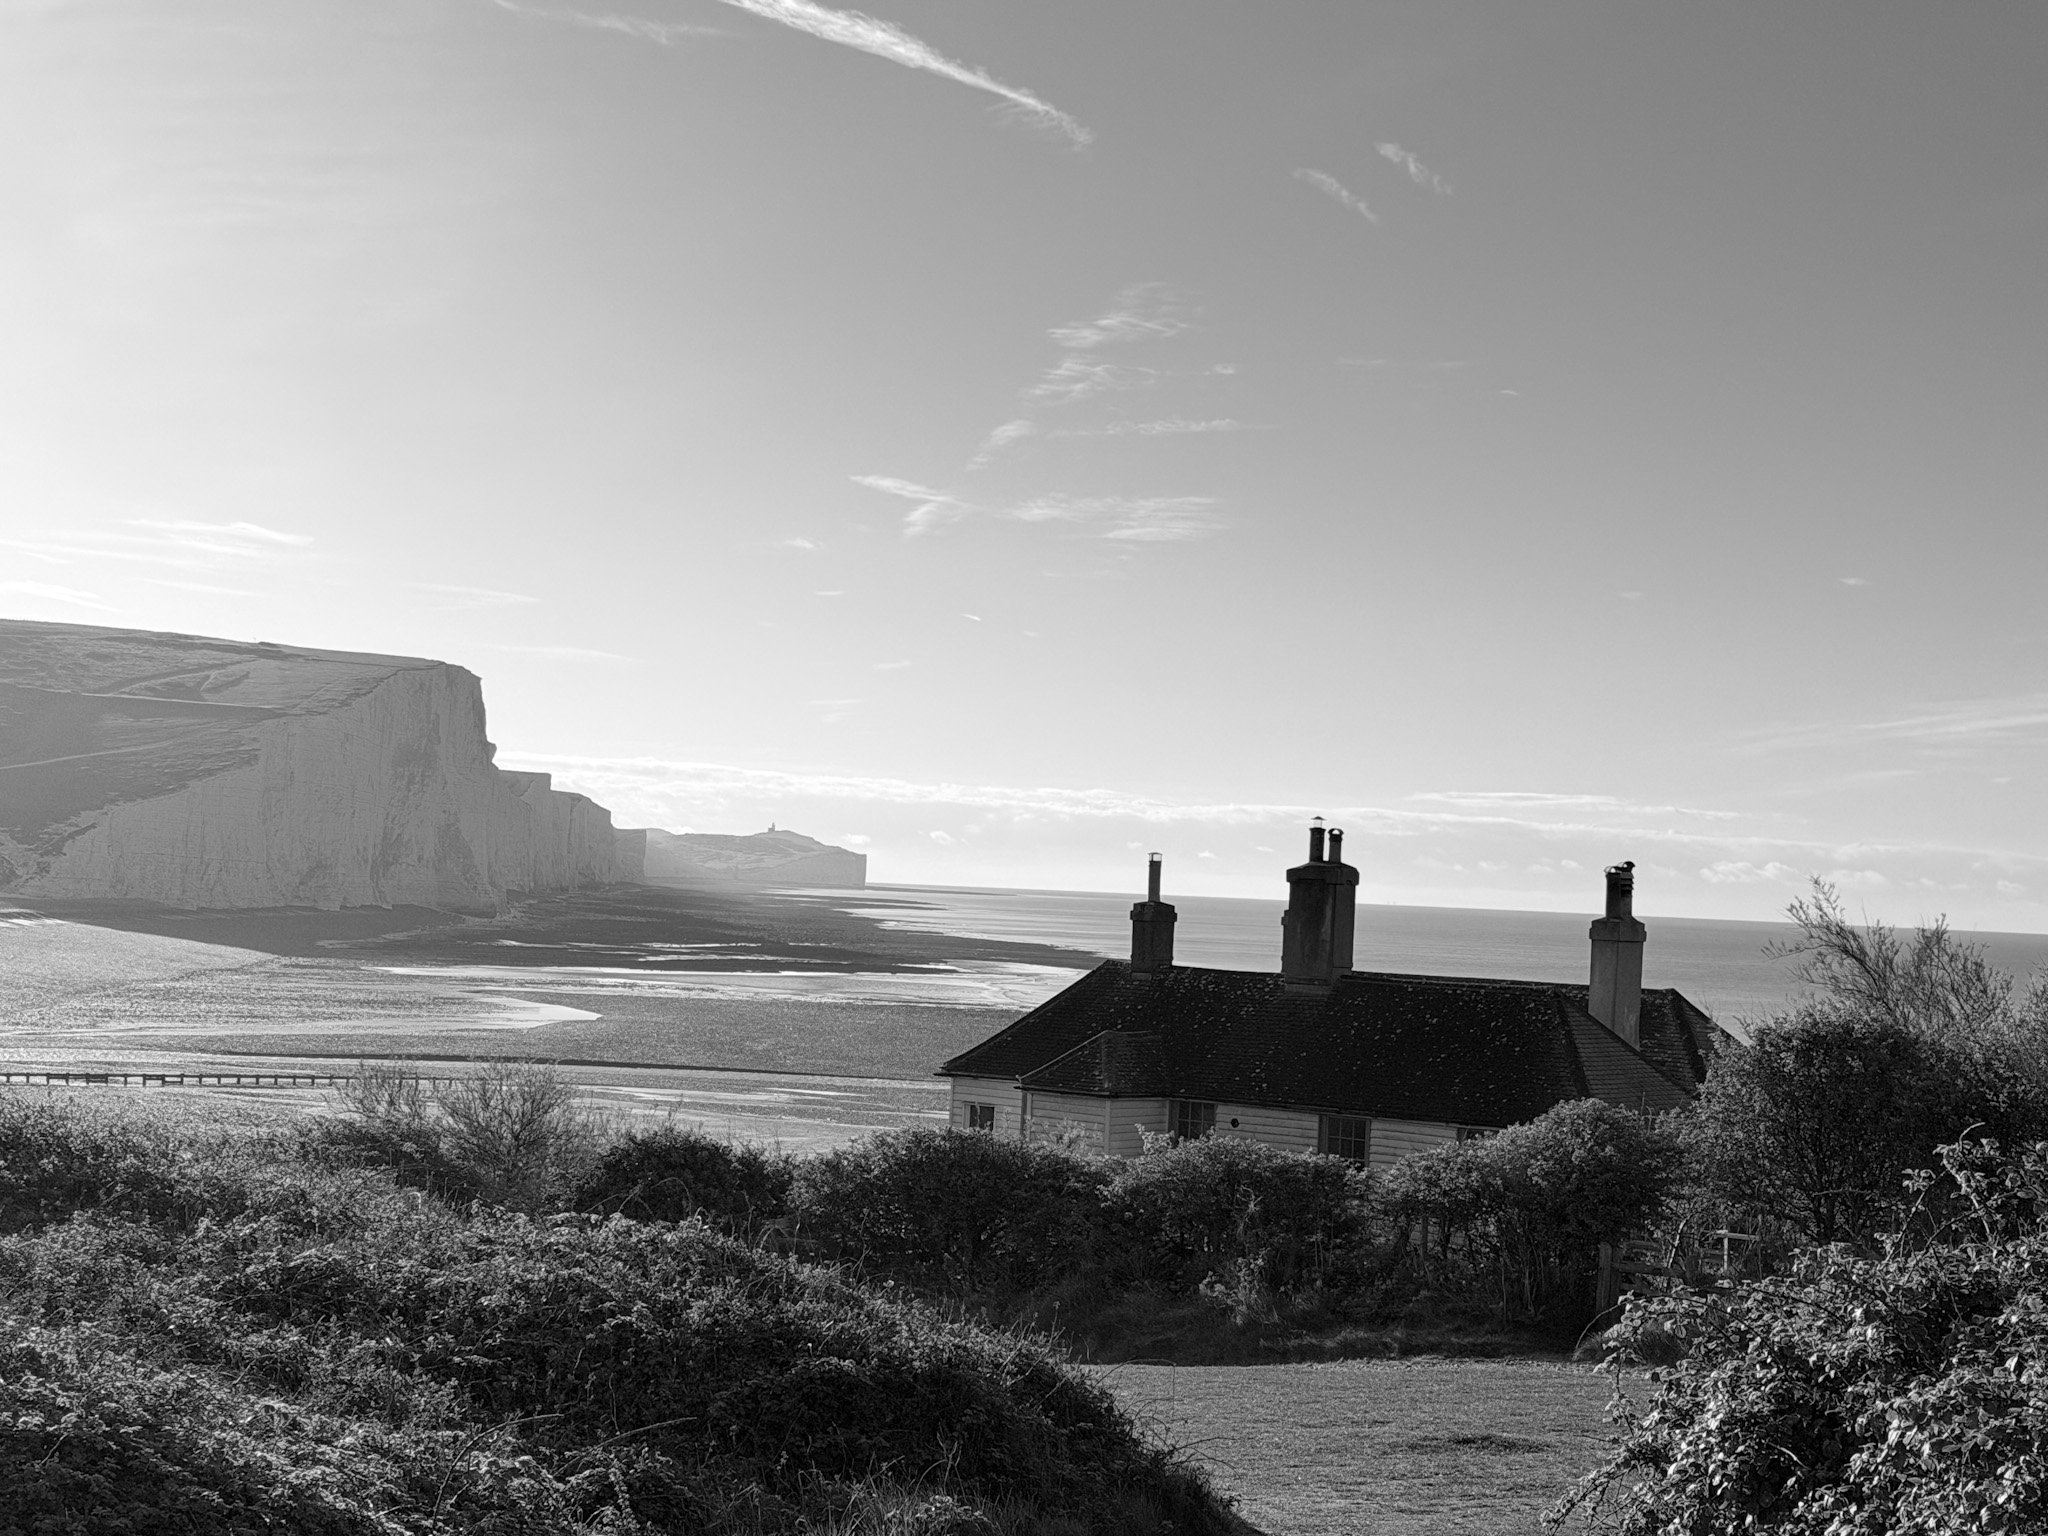
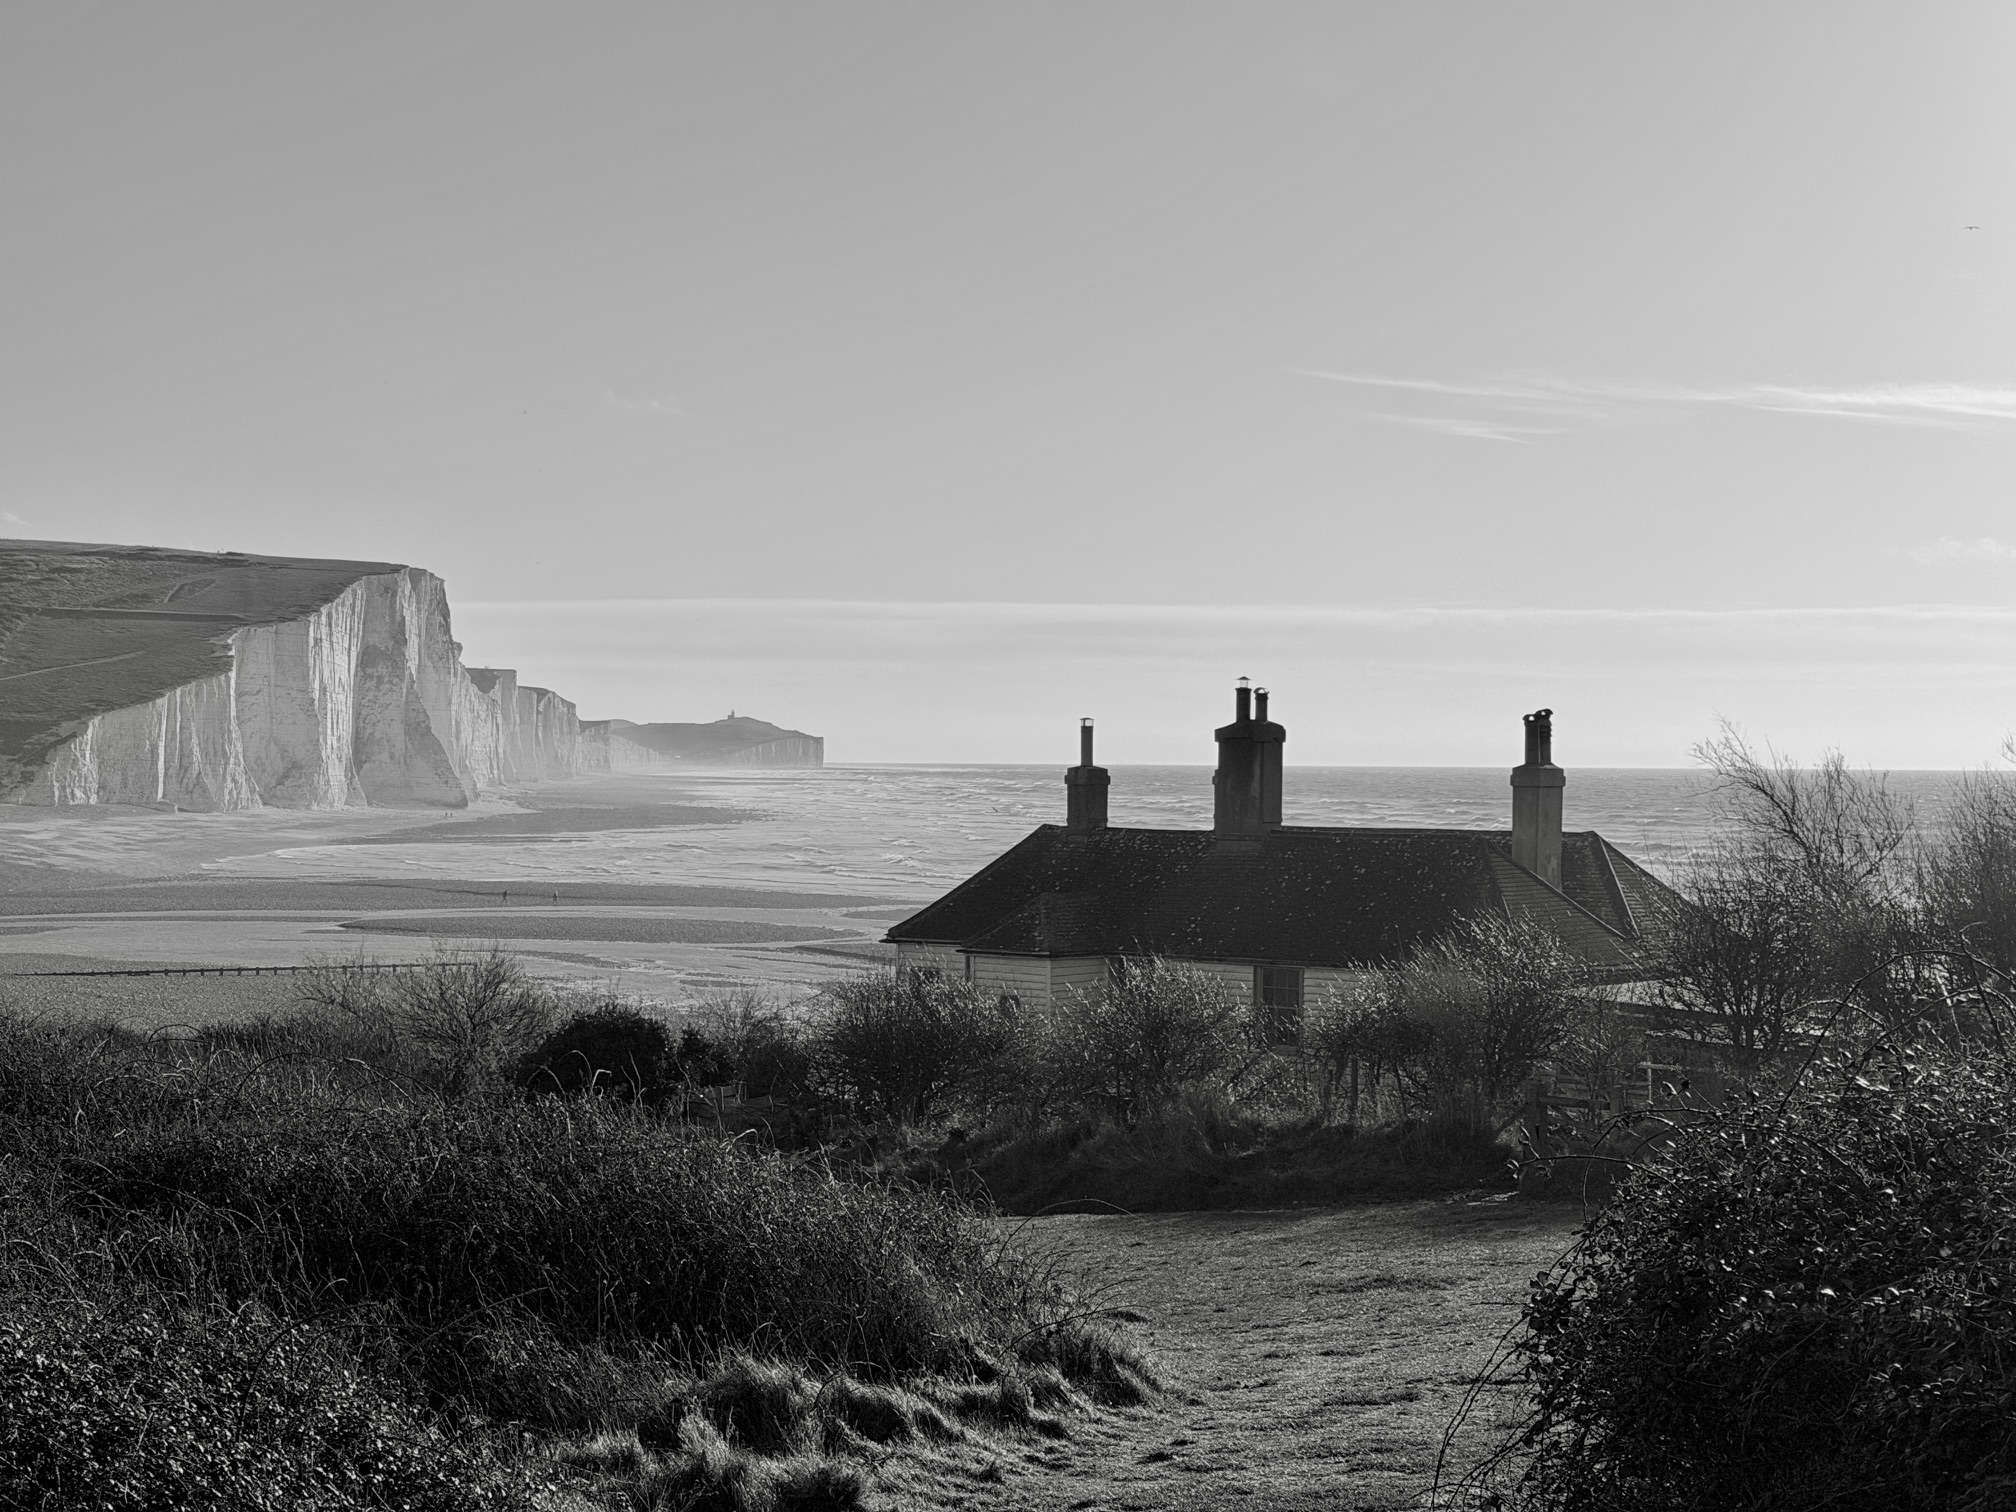
Blue hour (20-40 minutes after sunset) offers different magic: deep blue sky, last glow on cliffs, potential for long exposures with lights (Belle Tout lighthouse, ships on horizon). We often stay past sunset specifically for blue hour shots.
Seasonal Photography Opportunities
🌸 Spring (April - May)
- • Wildflowers: Cowslips, orchids, sea campion in foregrounds
- • Green cliffs: Maximum contrast with white chalk
- • Lambs: If you're into agricultural photography
- • Light: Clean, clear (less humidity than summer)
- • Challenges: April showers, muddy paths after rain
☀️ Summer (June - August)
- • Blue skies: Postcard-perfect but can be boring
- • Swimming shots: People in water adds scale/life
- • Crowds: Compositional challenge, can create energy
- • Yellow grass: Less photogenic by July (faded)
- • Challenges: Harsh midday light, heat haze
🍂 Autumn (September - October)
- • Golden light: Warm, directional, photographer's dream
- • Mist: Valley fog creates atmospheric layers
- • Empty trails: Post-holiday quiet, easier compositions
- • Grass recovery: Greening up after summer yellowing
- • Best overall: This is when we shoot most
❄️ Winter (November - March)
- • Dramatic weather: Storm light, moody skies, epic clouds
- • Storm photography: Waves crashing (dangerous, exciting)
- • Low sun angle: ALL day is golden hour
- • Completely empty: You'll be alone
- • Challenges: Cold, wind, rain, mud, short days
Practical Photography Tips
📷 Tripod or Handheld?
Our verdict: Both. Tripod for sunrise/sunset (slow shutter speeds, precise composition, long exposures). Handheld for midday (flexibility, spontaneity, less gear to carry up hills).
Lightweight carbon fiber tripod (Manfrotto Befree) is worth the investment if you're serious. Heavy aluminum tripods stay home after one ridge walk—we learned this carrying 3kg of Manfrotto up Haven Brow. Never again.
🔍 Filters Worth Bringing
Polarizer: Reduces glare from chalk, deepens blue sky, cuts through haze. Essential for summer midday shooting. Screw-on 77mm (or your lens diameter) is fine.
ND filter: Neutral density (6-stop or 10-stop) for long exposures in daylight. Smooths water, creates motion blur in grass/clouds. Square filter systems (Lee, Cokin) more versatile but pricier. We use 6-stop ND for most water shots.
🔋 Battery Life
Cold weather (winter, early morning) drains batteries fast. We've had DSLR batteries go from 100% to 20% in an hour at 2°C February sunrise. Always bring spare. Keep spare in inside jacket pocket (body warmth preserves charge). Never leave batteries in cold car overnight.
💾 Memory Cards
Shooting RAW = big files (25-40MB per shot). A sunrise session easily generates 200+ shots = 5-8GB. Bring 32GB minimum, 64GB comfortable. We use SanDisk Extreme Pro (fast write speeds for burst mode). Format card before each shoot.
🌧️ Weather Protection
Salt spray: Coastal wind carries salt. It gets on your lens, dries into spots, ruins shots. Bring microfiber cloth, clean lens every 10 minutes in wind.
Rain: Rain cover for camera (cheap plastic £10 ones work fine). Or just use clear plastic bag with hole for lens. We've shot in drizzle many times—some of our best atmospheric shots.
Wind: Weight your tripod (hang camera bag from center hook). Use cable release or 2-second timer (prevents shake when pressing shutter). Wind gusts can blur long exposures—wait for lulls.
We may earn a small commission on bookings made through this link, at no extra cost to you. More info.
£4.99 · 24-page PDF · Instant download
The Seven Sisters Ultimate Guide
The complete 24-page companion built from first-hand walks — every cliff, all four graded routes, tide windows and a parking strategy. Designed to work offline, right on the cliff top.
- All 7 cliffs — heights, geology & viewpoints
- Four graded walking routes, fully mapped
- Tide windows, light calendar & day plans
- Parking strategy & seasonal planner
Just want the basics? Download the free 2-page walk guide
Want an expert-led Seven Sisters tour?
From guided cliff walks and wildlife safaris to geology hikes and photography tours — explore all our curated experiences with local guides.